Introduction
Windows 11 is the next-generation operating system that follows the highly popular Windows 10. It introduces a new design language with centered taskbar icons, rounded corners, and a simplified Start menu. Alongside the visual overhaul, Windows 11 brings significant performance improvements and new productivity features, making it an enticing upgrade for Windows enthusiasts.
Windows 11, which was launched on October 5, 2021, represents the latest significant release of Microsoft’s Windows NT operating system. It offers a complimentary upgrade to Windows 10 (released in 2015) and is compatible with Windows 10 devices that meet the newly established system requirements for Windows 11.
Notable modifications have been made to the Windows shell in Windows 11, drawing inspiration from the now-canceled Windows 10X. These changes include a revamped Start menu, the replacement of “live tiles” with a dedicated “Widgets” panel on the taskbar, the ability to create sets of tiled windows that can be minimized and restored as a group from the taskbar, as well as the introduction of new gaming technologies inherited from Xbox Series X and Series S, such as Auto HDR and Direct Storage (available on compatible hardware).
In Windows 11, the default web browser has transitioned from Internet Explorer (IE) to the Chromium-based Microsoft Edge, following in the footsteps of its predecessor, Windows 10. Furthermore, Microsoft Teams has been seamlessly integrated into the Windows shell. Microsoft has also unveiled plans to enhance flexibility in software distribution through the Microsoft Store and to extend support for Android apps on Windows 11, including a collaboration with Amazon to provide access to its app store for this purpose.
| Develop By | Microsoft |
|---|---|
| Released Date | 24-June-2021 |
| Programming Language | C, C++, |
| Latest Version | 22H2 (10.0.22621.1702) 9-May-2023 |
| Languages | Available in 110 languages |
| Kernel | Windows NT(Hybrid) |
| Platforms | x86, x64, ARMv8.1 |
| Preceded by | Windows 10Create |
Create Backup
Before proceeding with a clean installation of Windows 11, it is crucial to back up your files to ensure their safety and prevent any data loss. Here’s a step-by-step guide on how to back up your files:
Identify Important Files:
Determine which files, documents, photos, videos, and other data are essential to you. Focus on personal files, such as documents created, photos captured, and any other data that holds significant value or cannot be easily replaced.
External Storage Device:
Connect an external storage device, such as a USB flash drive, external hard drive, or network-attached storage (NAS) device, to your computer. Ensure that the storage device has sufficient space to accommodate all your files.
Manual File Transfer:
Copy and paste your important files from your computer’s internal storage to the external storage device. You can use File Explorer (Windows Explorer) to navigate through your folders and drag and drop or copy and paste files to the external device.
File Backup Software:
Alternatively, you can utilize file backup software to automate the process. Various options are available, including built-in backup tools in Windows, third-party software like EaseUS Todo Backup, or cloud storage services like Google Drive or Dropbox. Install the software you choose, configure the backup settings, select the files you want to back up and initiate the backup process.
Verify Backup:
After the backup process completes, double-check that all your important files have been successfully copied to the external storage device or cloud storage. Open and review a few random files to ensure their integrity.
System Image Backup:
For an extra layer of protection, consider creating a system image backup. This creates a snapshot of your entire operating system, including settings, installed applications, and files. In case of any issues during the clean installation, you can restore your system to its previous state using the system image. Windows has a built-in system image backup tool that you can utilize for this purpose.
By following these steps, you can securely back up your files before performing a clean installation of Windows 11. Taking the time to safeguard your data ensures that you can restore your files and maintain continuity in your digital life even after the installation process is complete.
System Requirements for Windows 11
Before diving into the clean installation process, ensuring that your system meets the minimum requirements for Windows 11 is essential. Microsoft has introduced some new specifications to exploit the operating system’s capabilities fully. The requirements include a compatible processor, sufficient RAM, and a supported graphics card. Make sure to check Microsoft’s official website for detailed system requirements.
| RAM | Minimum 4 GB of RAM |
| Processor | 1 GHz or more (64-bit Compatible) minimum Dual Core or more, Soc. |
| Storage | Minimum Storage of 64 GB or more. |
| Firmware | Capability of UEFI or Secure Boot |
| TPM | TPM v.2.0 is Trusted Platform Module |
| Graphic Card | DirectX 12 Compatible or WDDM 2.0. |
| Display | HD 720p or higher, 8bits Color. |
| Internet | Internet should be available to get the update at the time of setup |
Before we begin, let’s take a look at the step-by-step process in the picture to learn how to perform a clean installation.
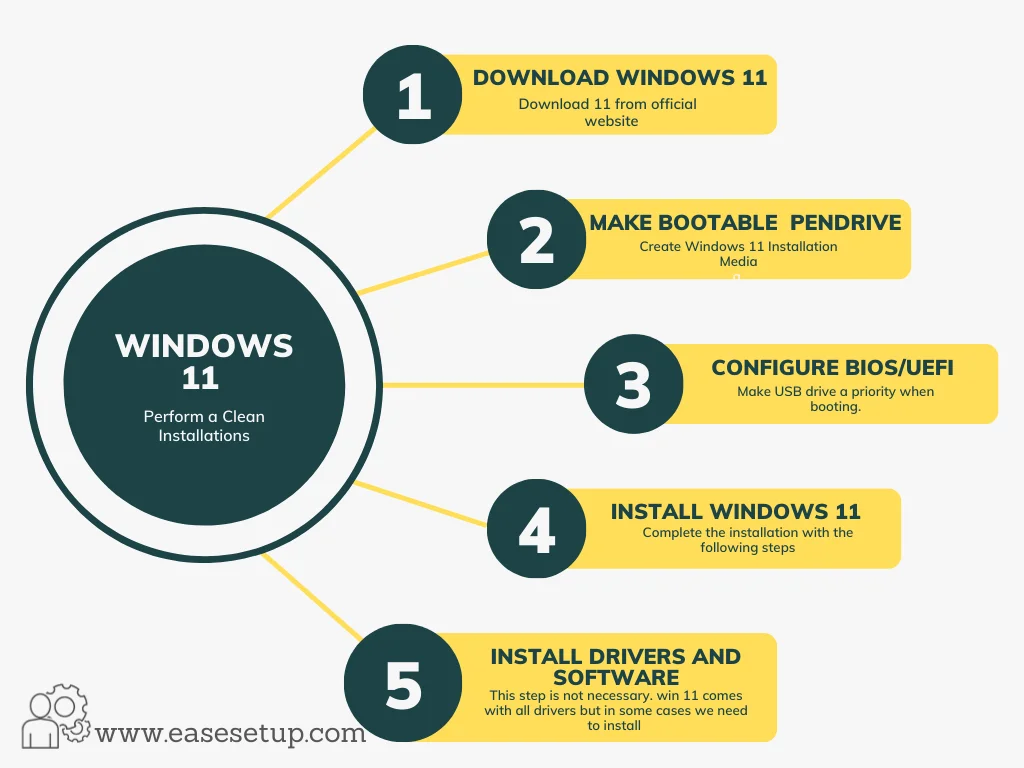
Download the Windows 11
The Common Question around the people is how to download and install Windows 11 Download the official Windows 11 ISO file from the Microsoft website. Next, create a bootable USB drive using a reliable tool like Rufus or the Windows USB/DVD Download Tool. This will allow you to install Windows 11 from the USB drive.
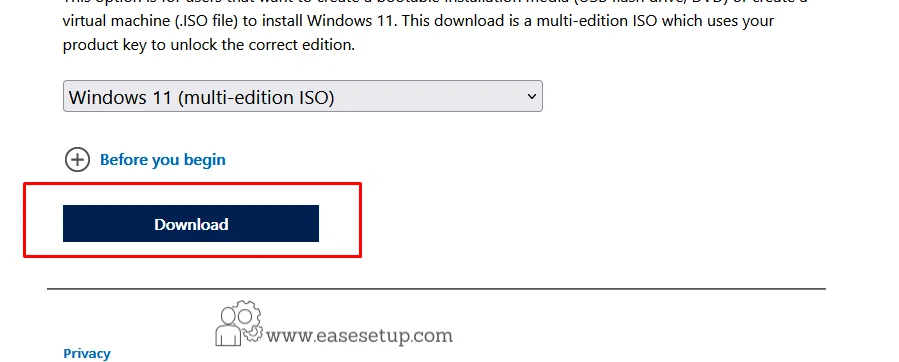
Please click the link to download Windows 11 from Microsoft Official Website

Next to choose the 3rd option image is given below.
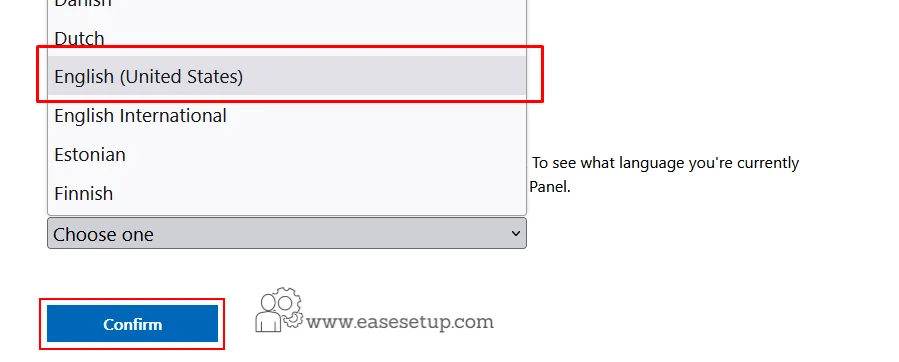
Choose the preferred language and click on confirm.
ISO files will start to download
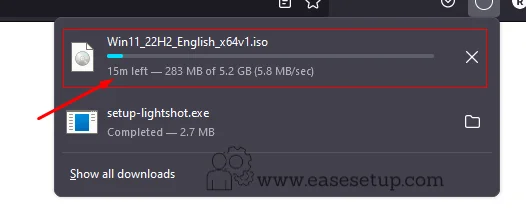
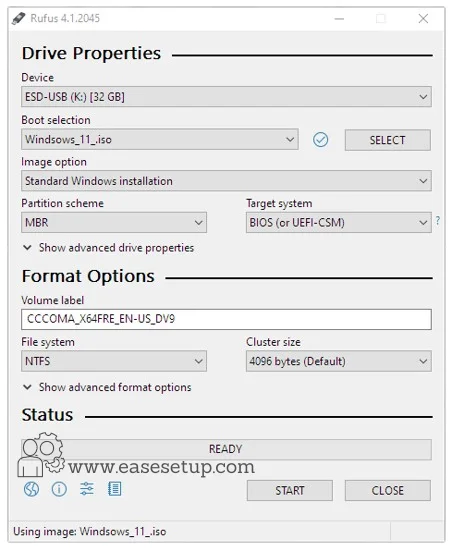
After finishing the download we’ll create a bootable pen drive with Rufus (Here is the link to Download the Rufus.)
Adjust BIOS/UEFI Settings
After All, is done do Restart your computer and access the BIOS or UEFI settings. Ensure that the boot order is set to prioritize booting from the USB drive. Save the changes and exit the BIOS/UEFI settings.
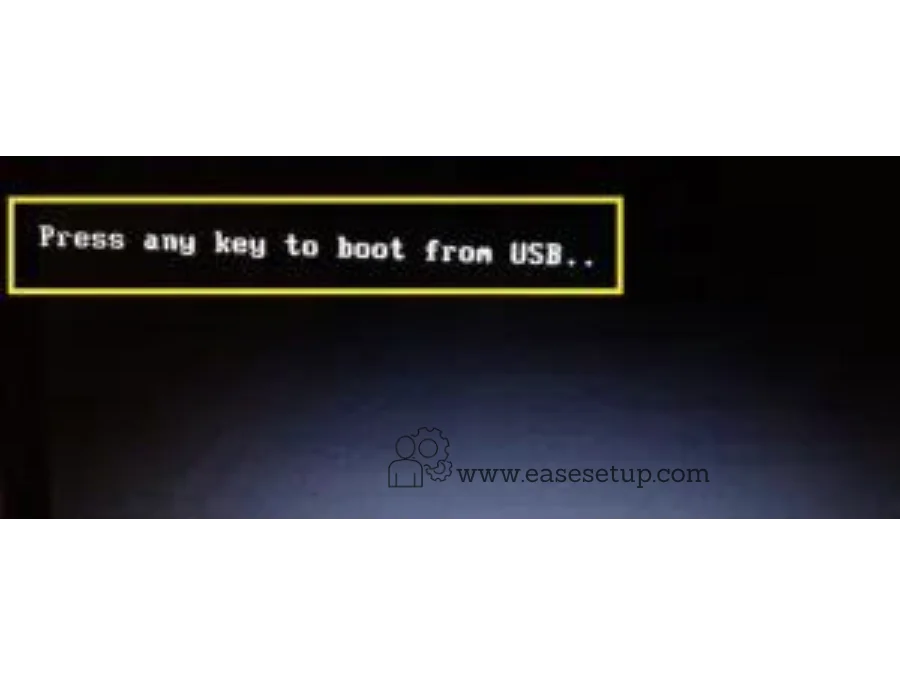
Insert the bootable USB drive into your computer and restart it, you will find the option
“Press any key to boot from USB” Press Enter or any key.
Install Windows 11
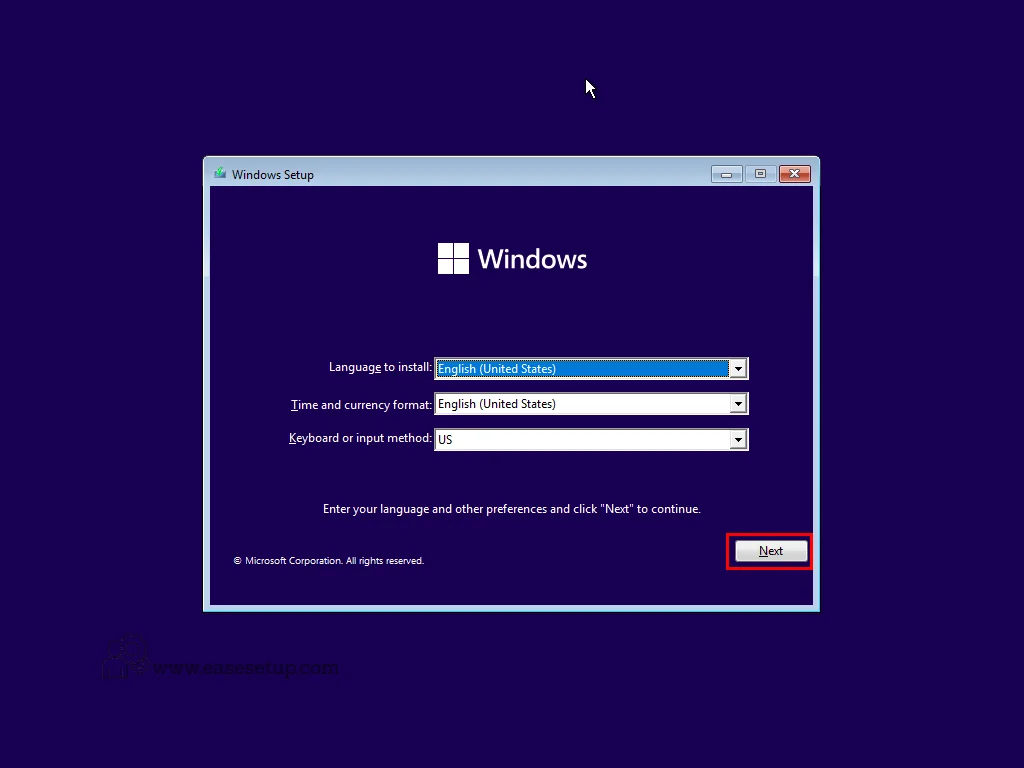
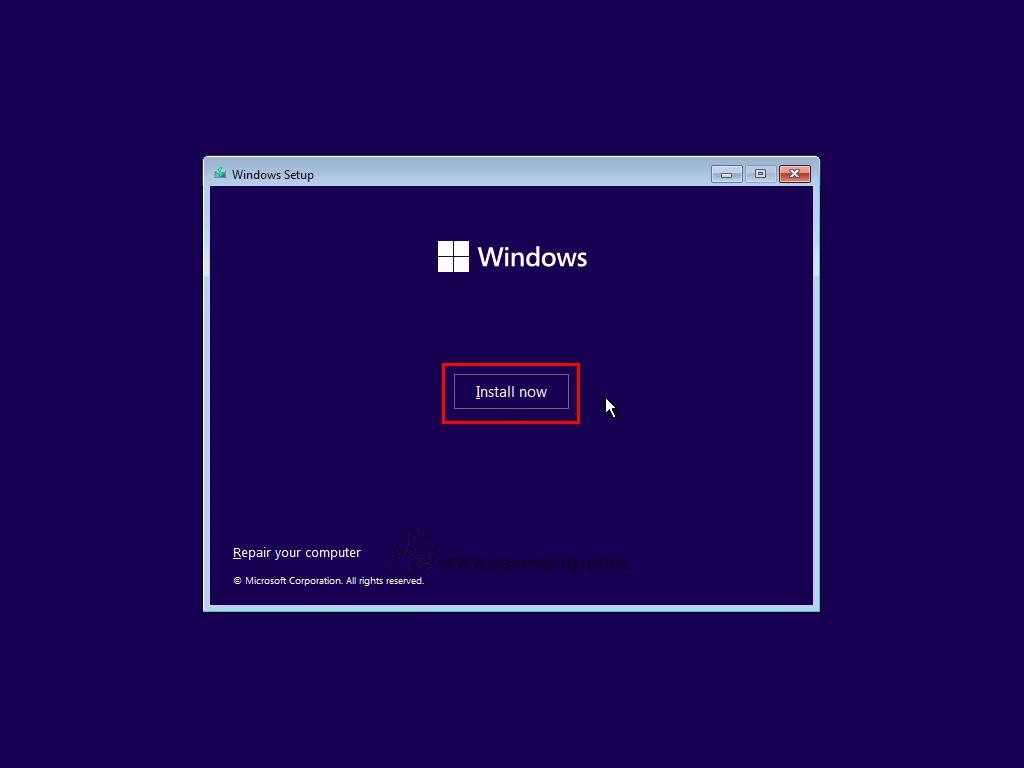
The Windows 11 installation process should start automatically. Follow the on-screen instructions, select your language preferences, and click “Install Now” to initiate the installation.
Select your Prefered Language and click next
Click Install
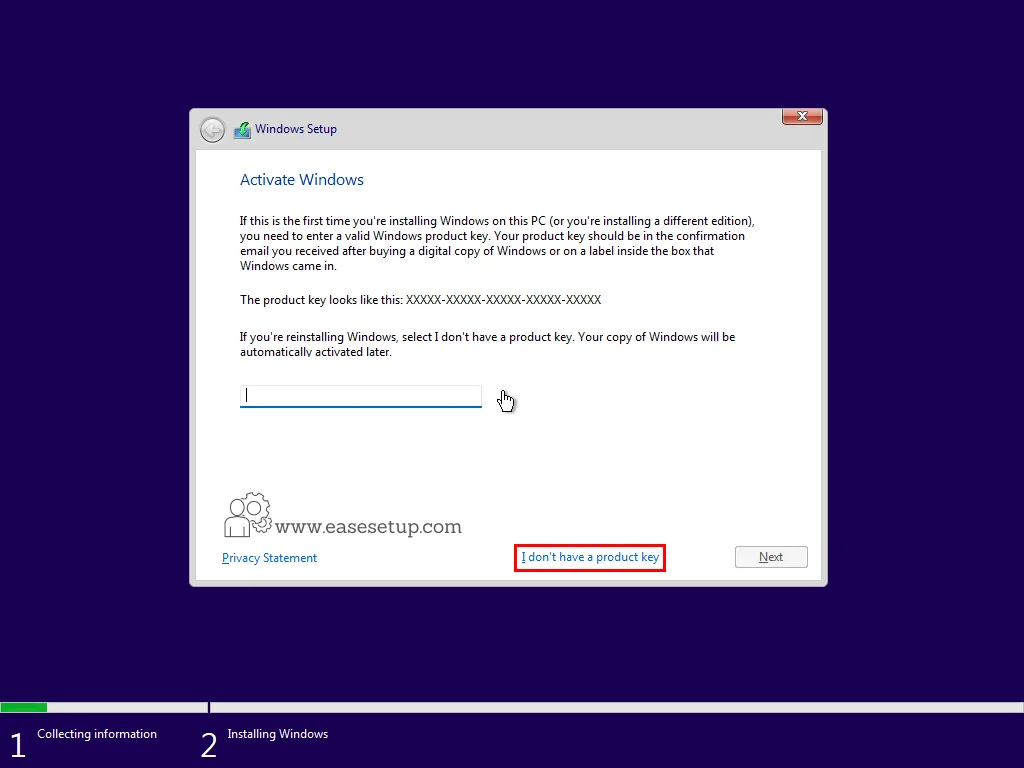
If prompted, enter your Windows 11 product key. If you don’t have a product key, you can select the option to skip this step “I don’t have a product Key“ but remember that you’ll need to activate Windows 11 later. Accept the Microsoft Software License Terms to proceed with the installation.
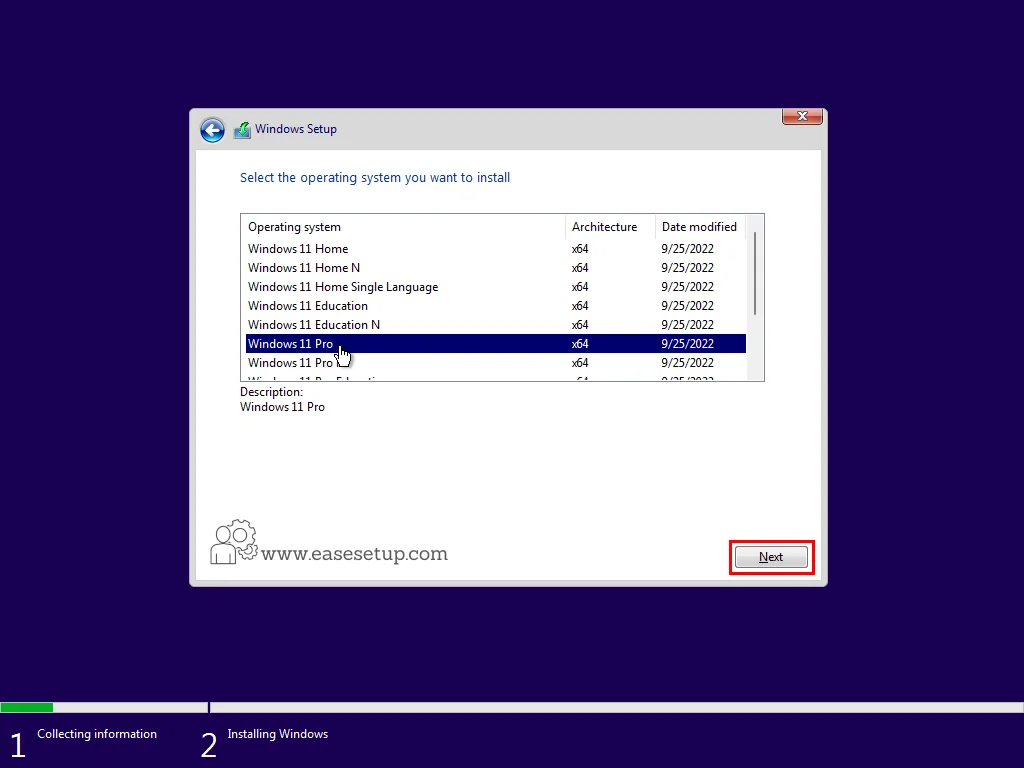
Select the Windows Edition here in my case Windows Pro, So I choose Windows 11 Pro.
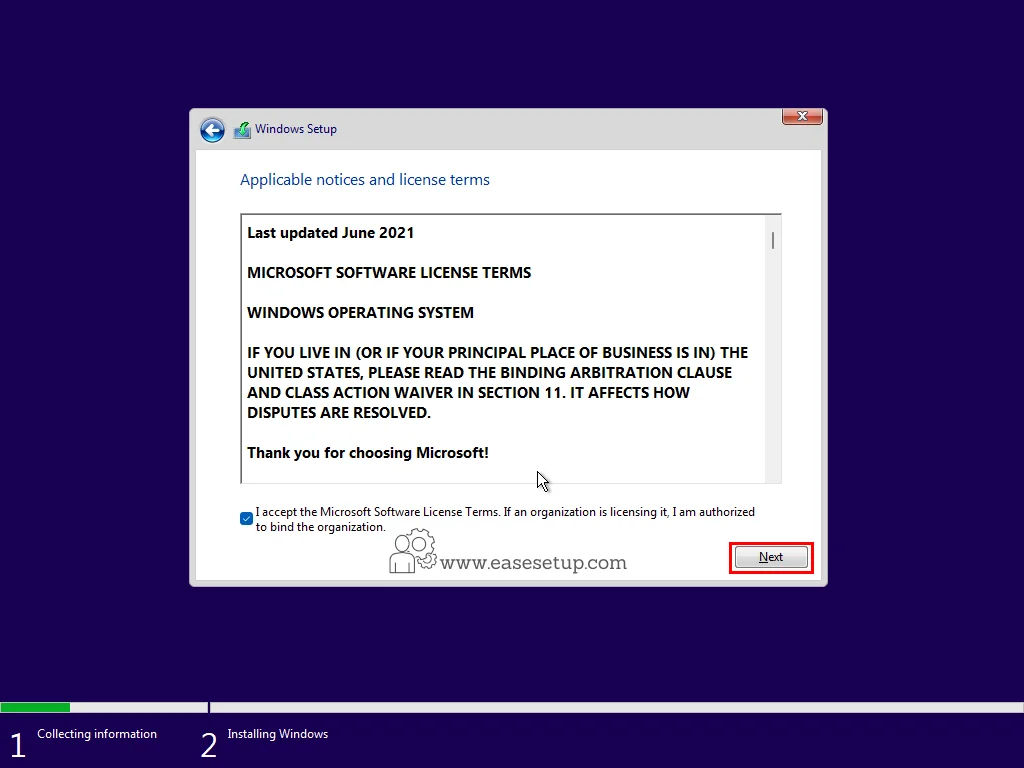
Click on I Accept… to proceed to the next step.
Here we choose Custom This allows you to perform a clean installation by formatting the existing partitions on your hard drive.
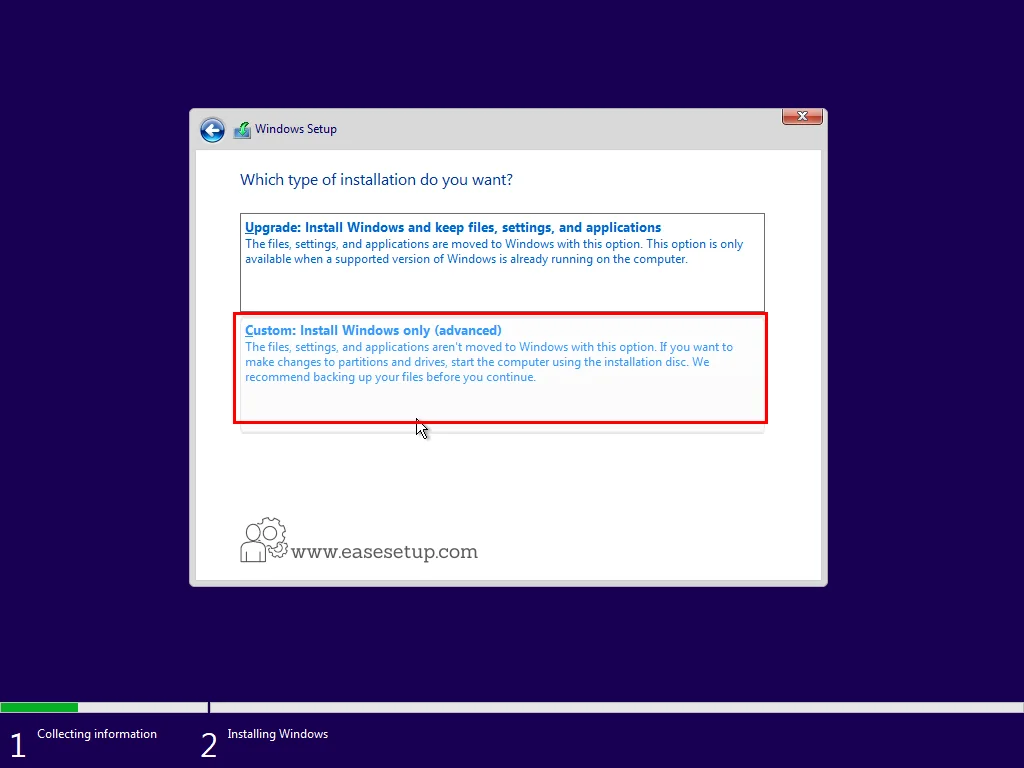
Format Partitions
If you have an existing OS available on your hard disk, Select each partition one by one and click “Delete.” This will remove all existing partitions, including the previous installation of Windows.
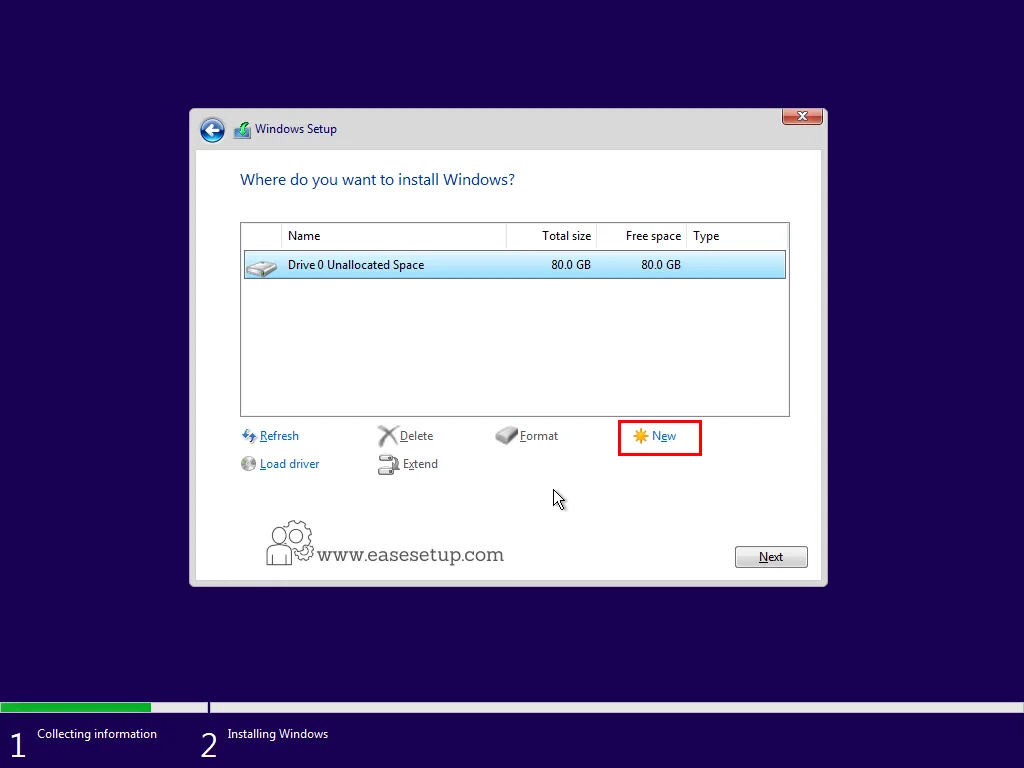
After deleting all partitions, you should be left with unallocated space, Select this unallocated space and click New
In Our Case, it is a New Hardisk we choose new to create partitions.
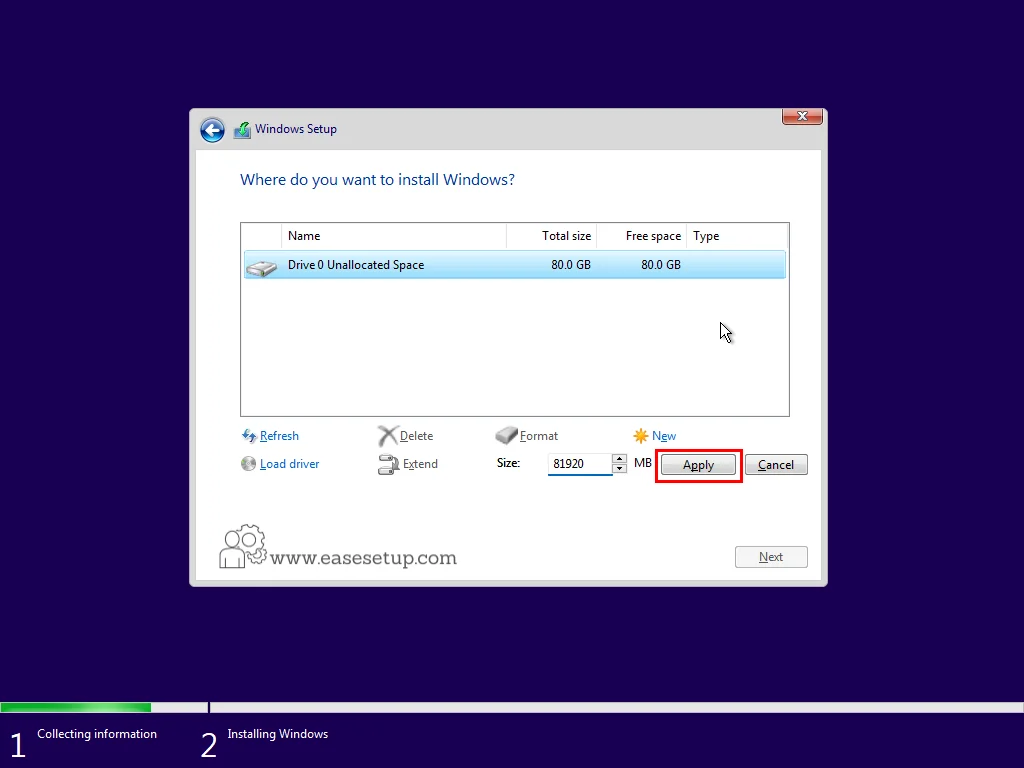
After Clicking New it will ask to specify the size of the Installation partition and click Apply
Windows 11 will automatically create the necessary partitions and begin the installation process.
Click Next.
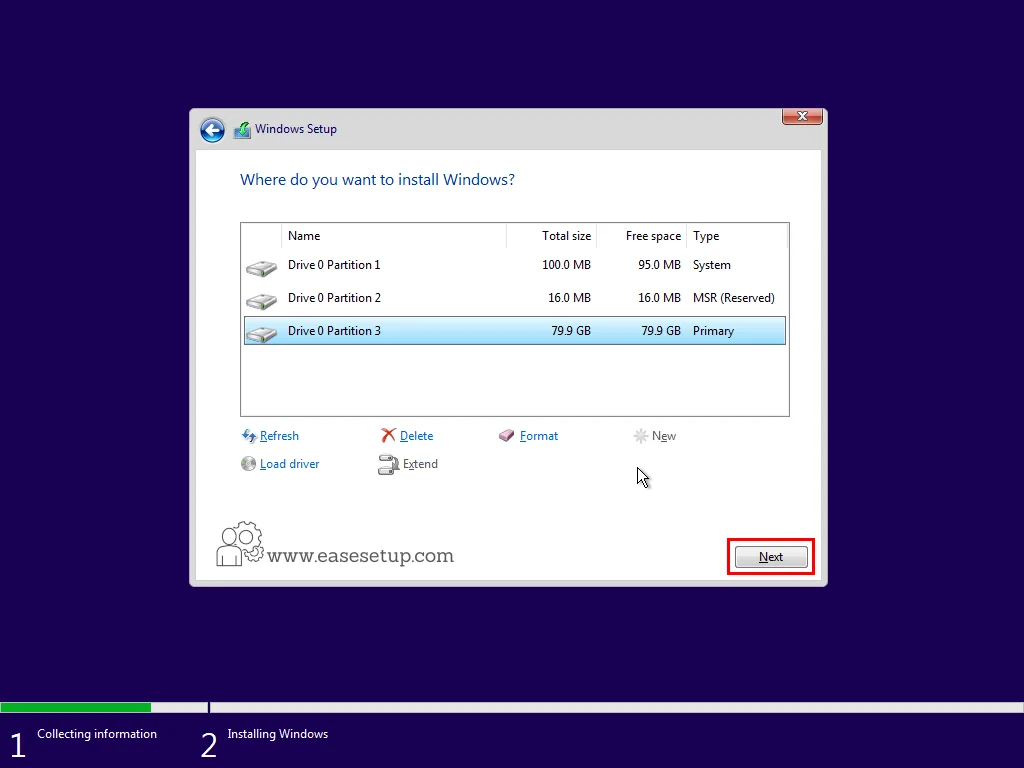
The installation will continue Automatically.
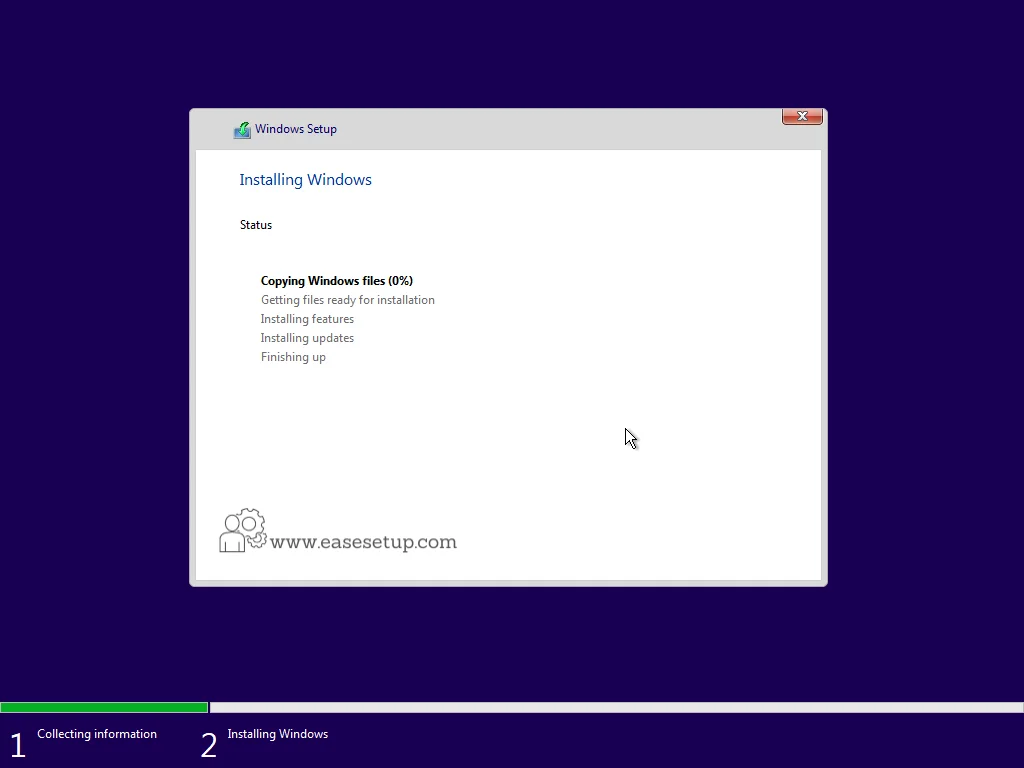
To Be Continued…
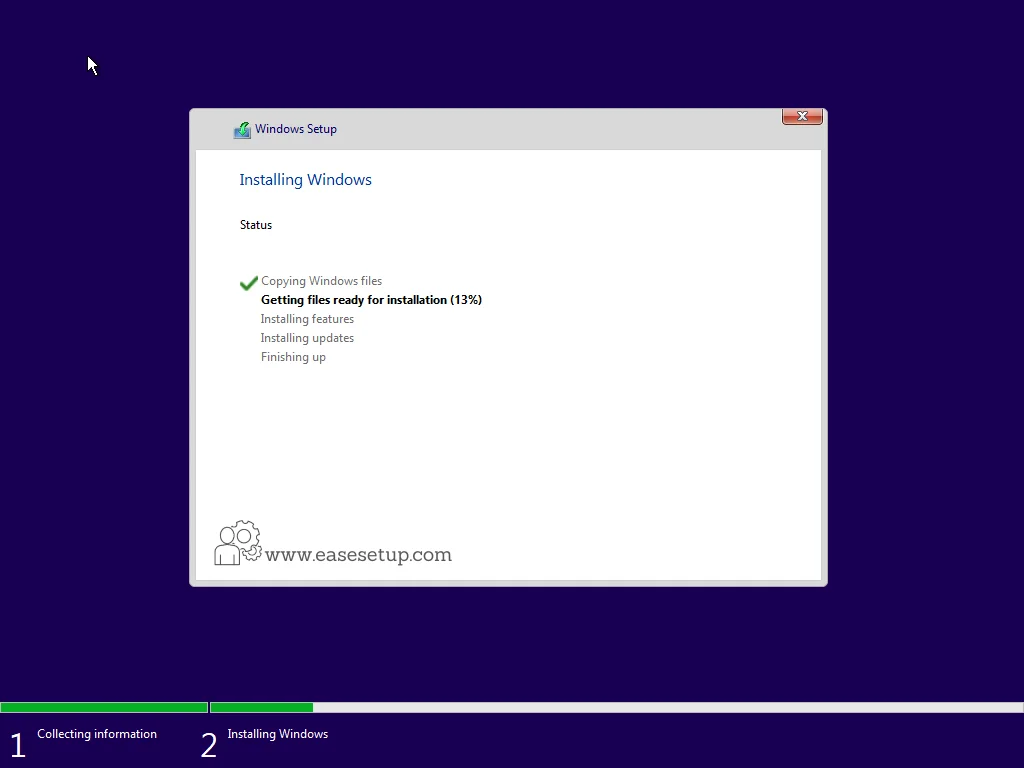
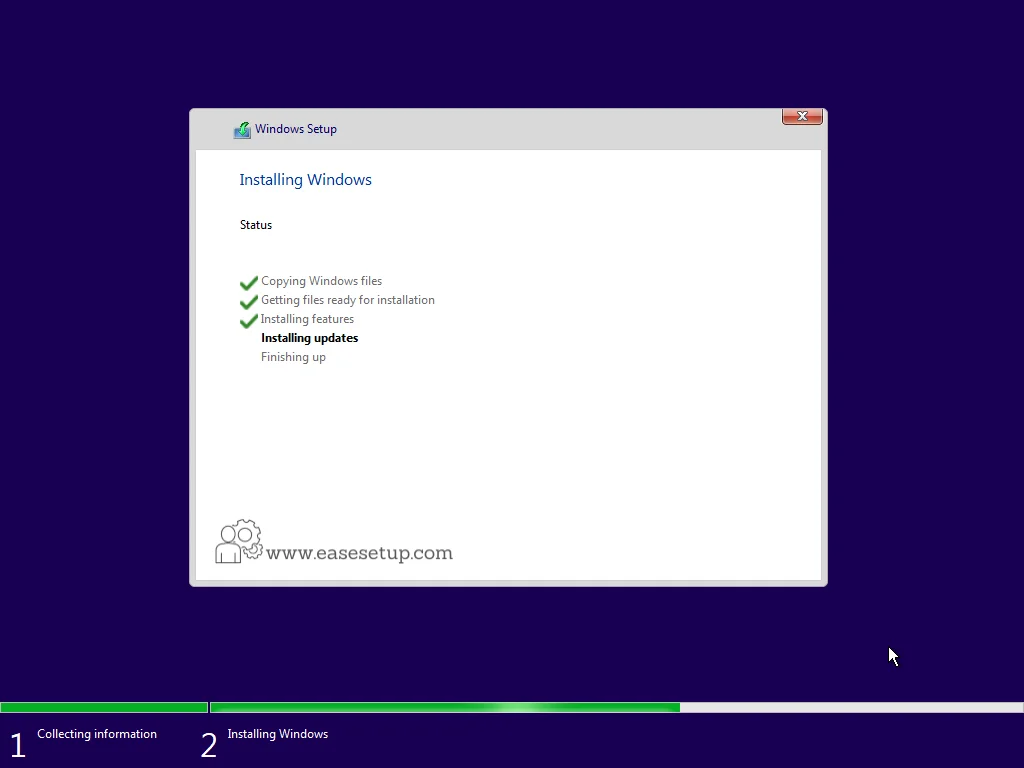
Installing Updates…
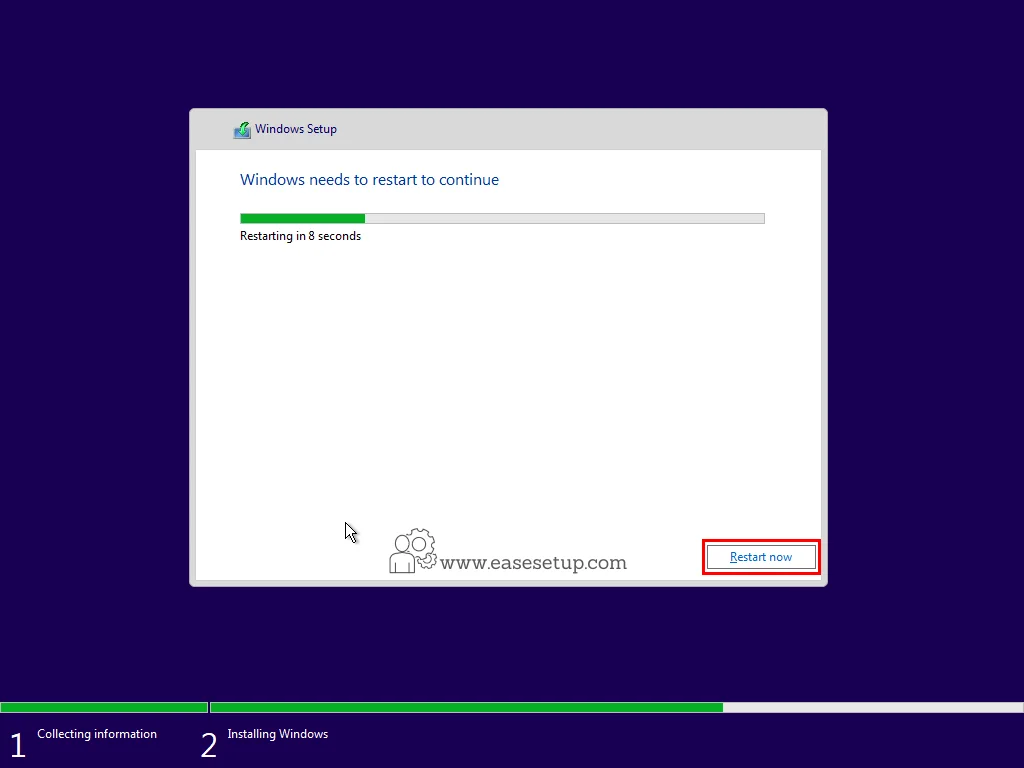
The system will restart automatically but you can restart manually to click Restart now
The system is Booting…
Booting Continue……

Windows is now ready for initial setup
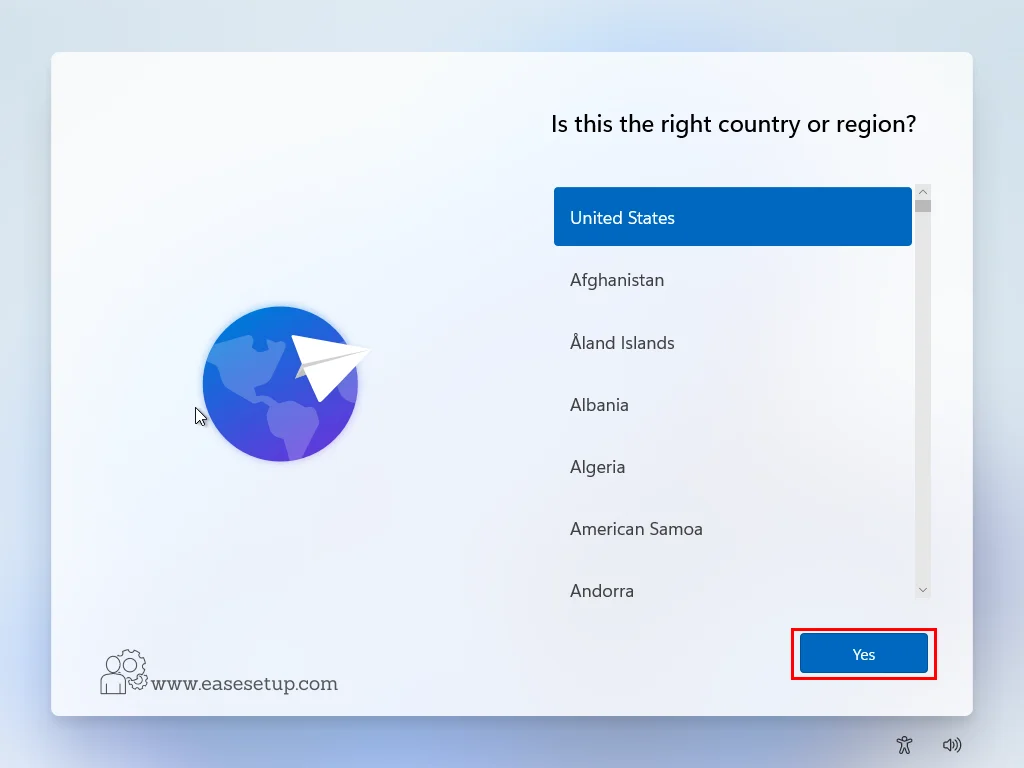
Set your preferred Region and click yes
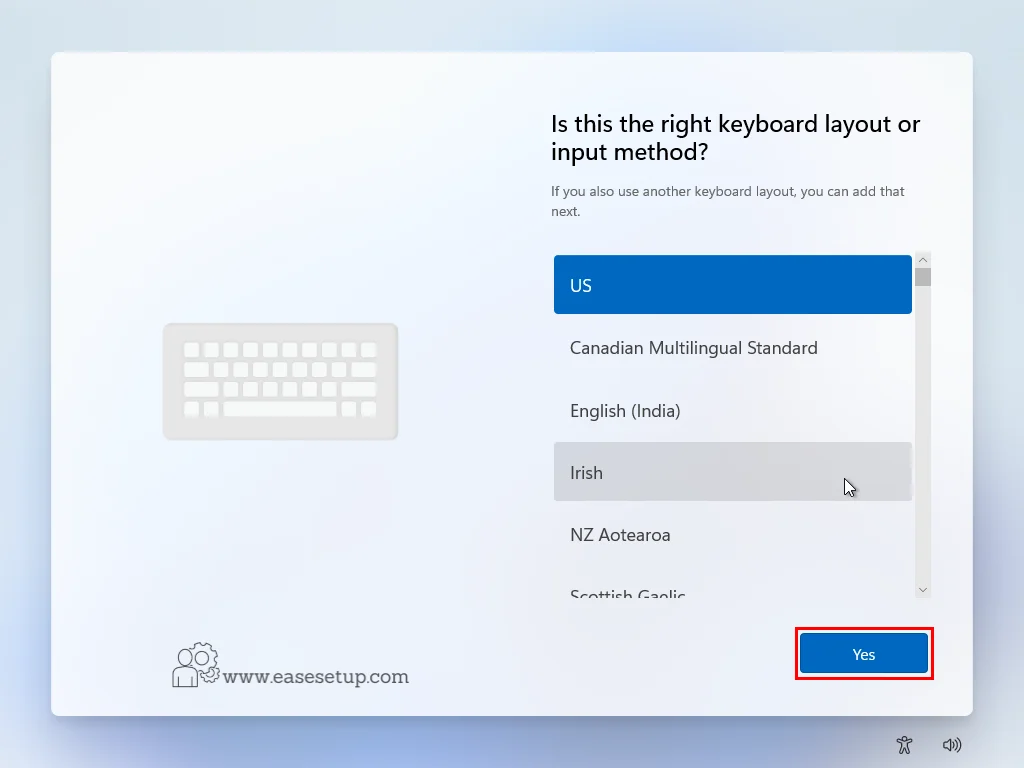
Set your Keyboard Language for me it is US click Yes
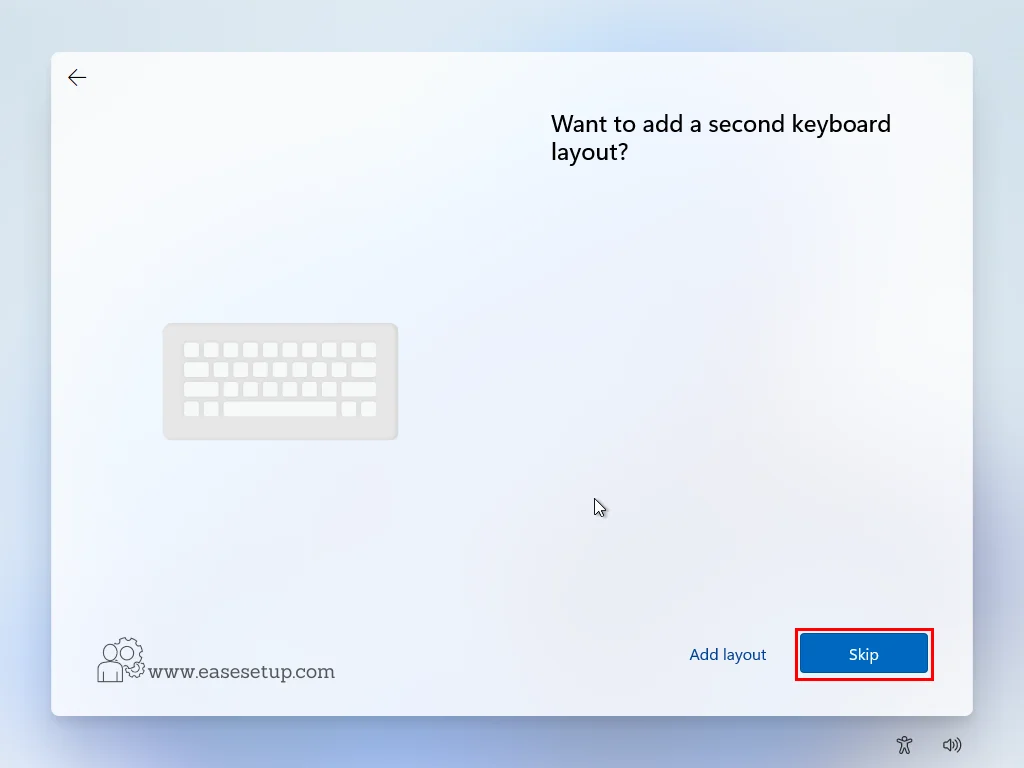
Add the second Keyboard layout if needed, In my case not needed click Skip
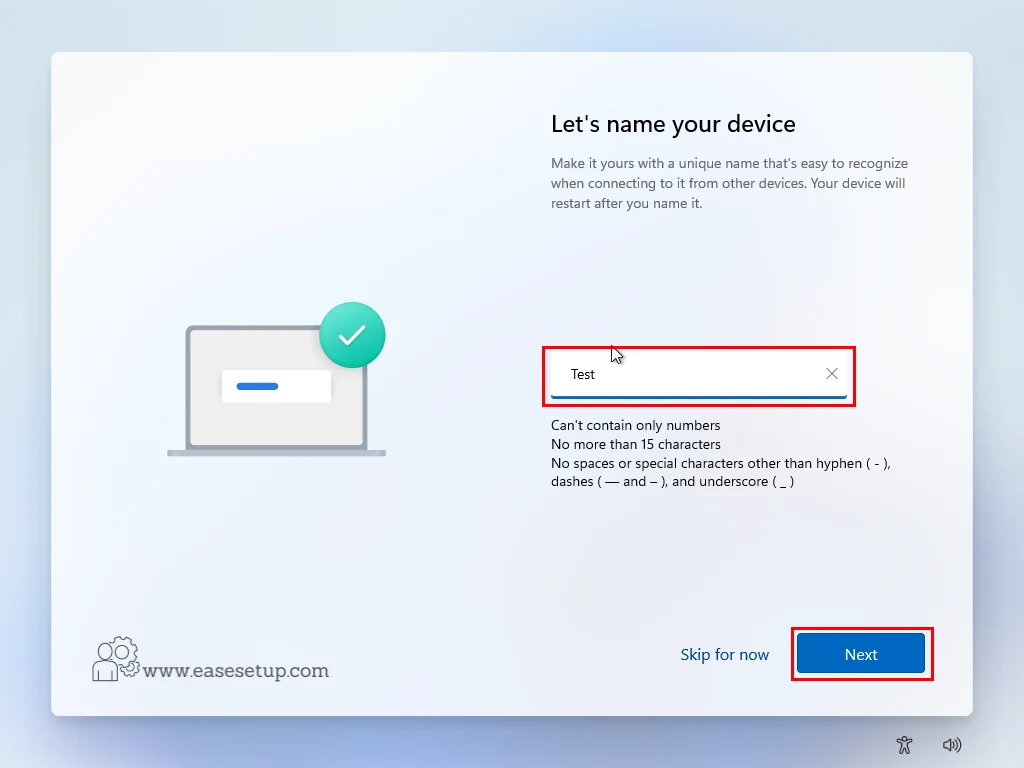
Give a name and click Next
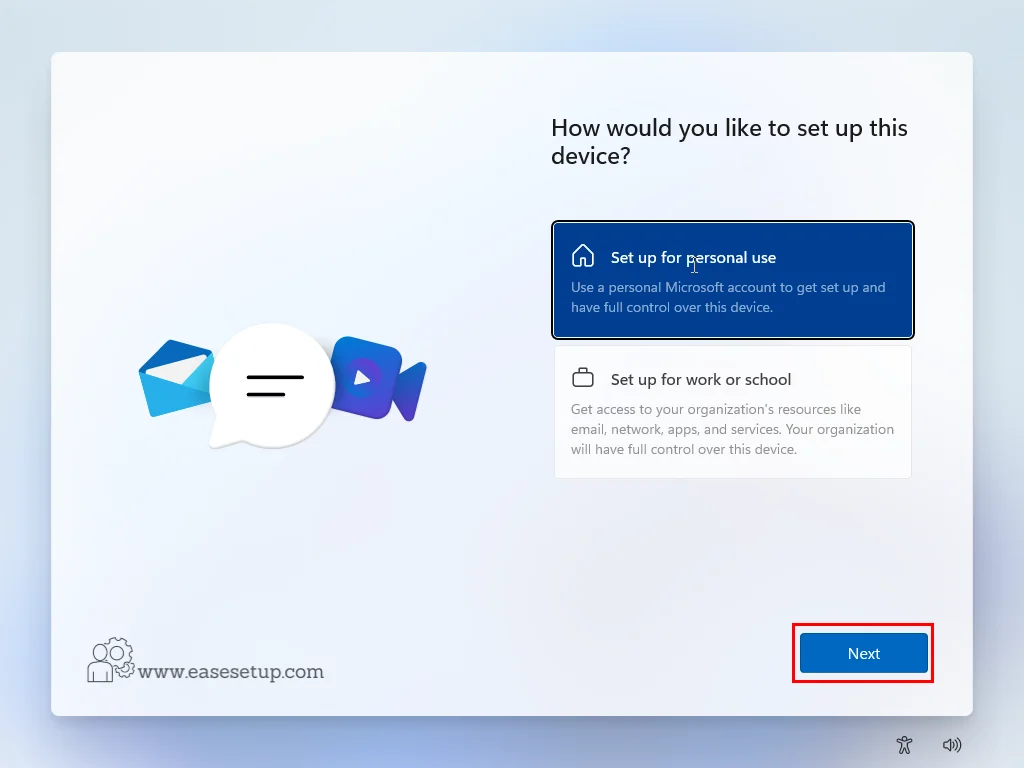
In my case, it is for personal use and click Next ( for office users log in through your work account)
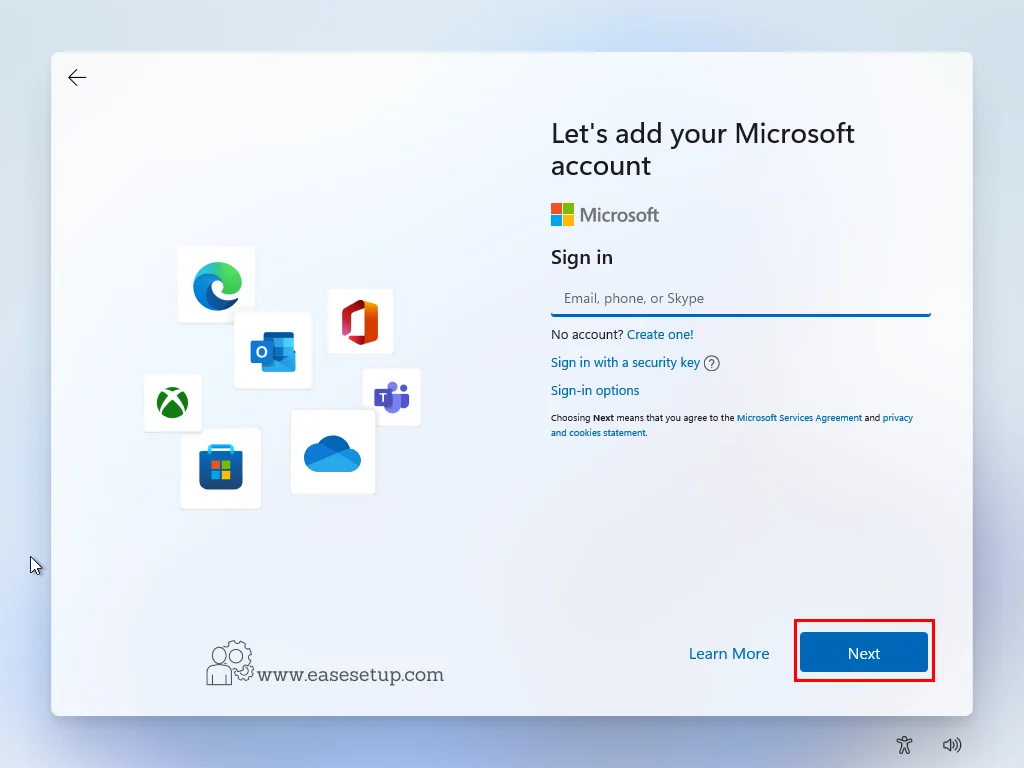
Log in through Microsoft Creational and click next
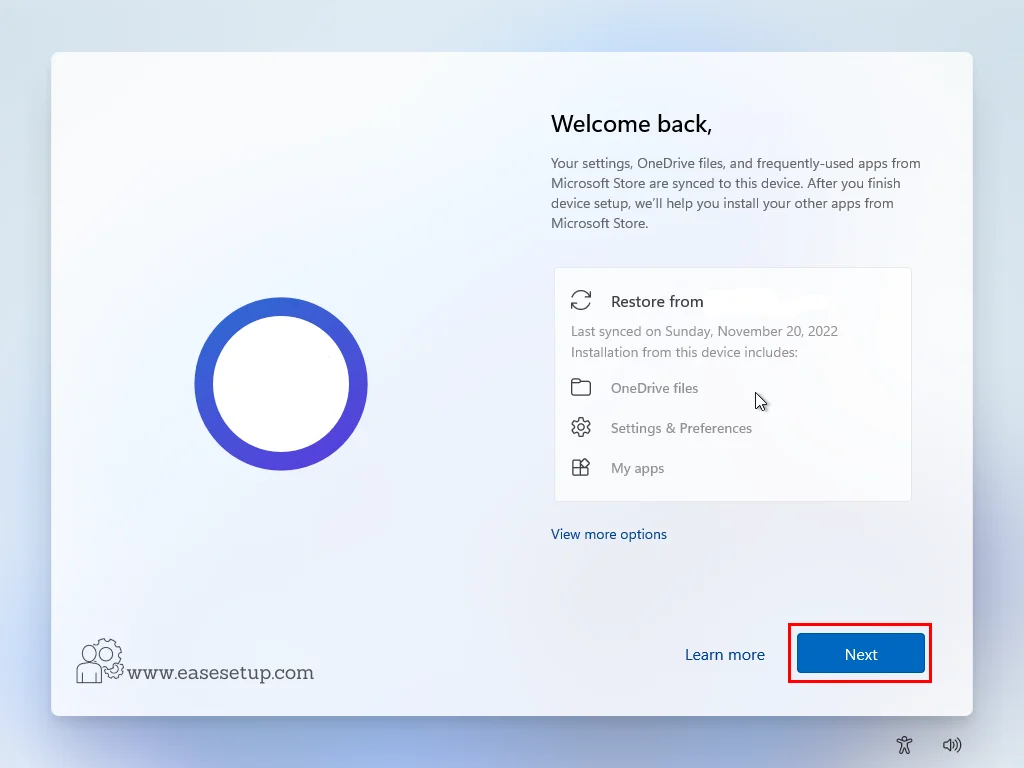
After successfully logging you will get a welcome message and click Next (you can restore your previous backup files, settings and apps)
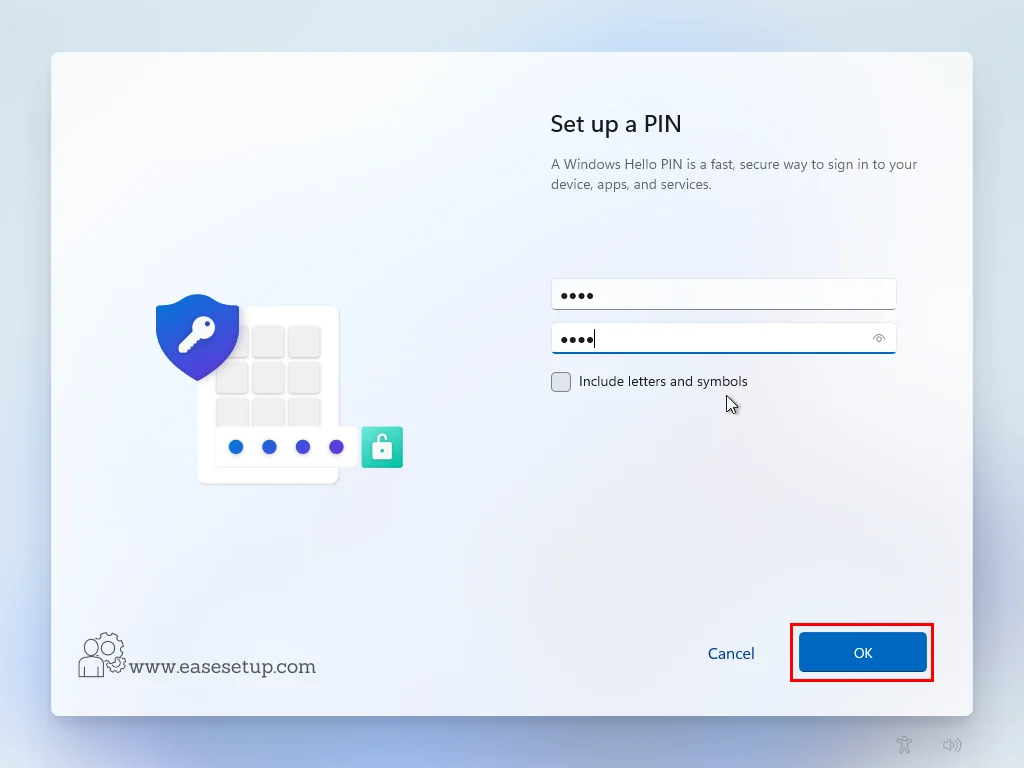
Set a 4-digit PIN click OK
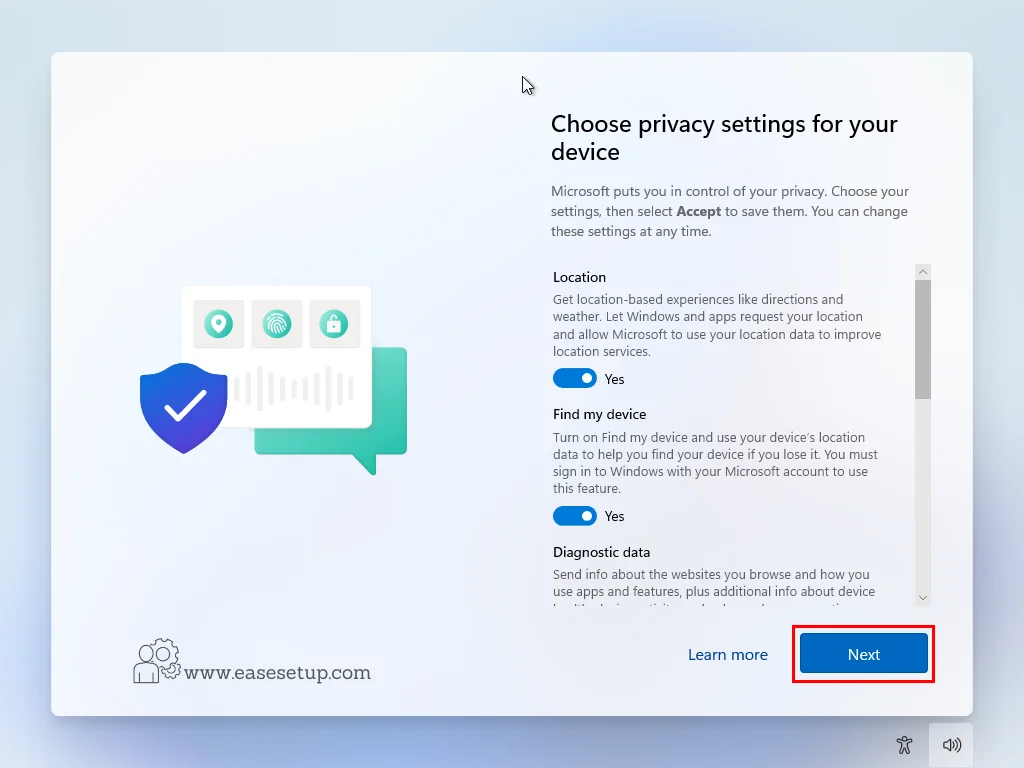
Choose the privacy setting as default and click Next
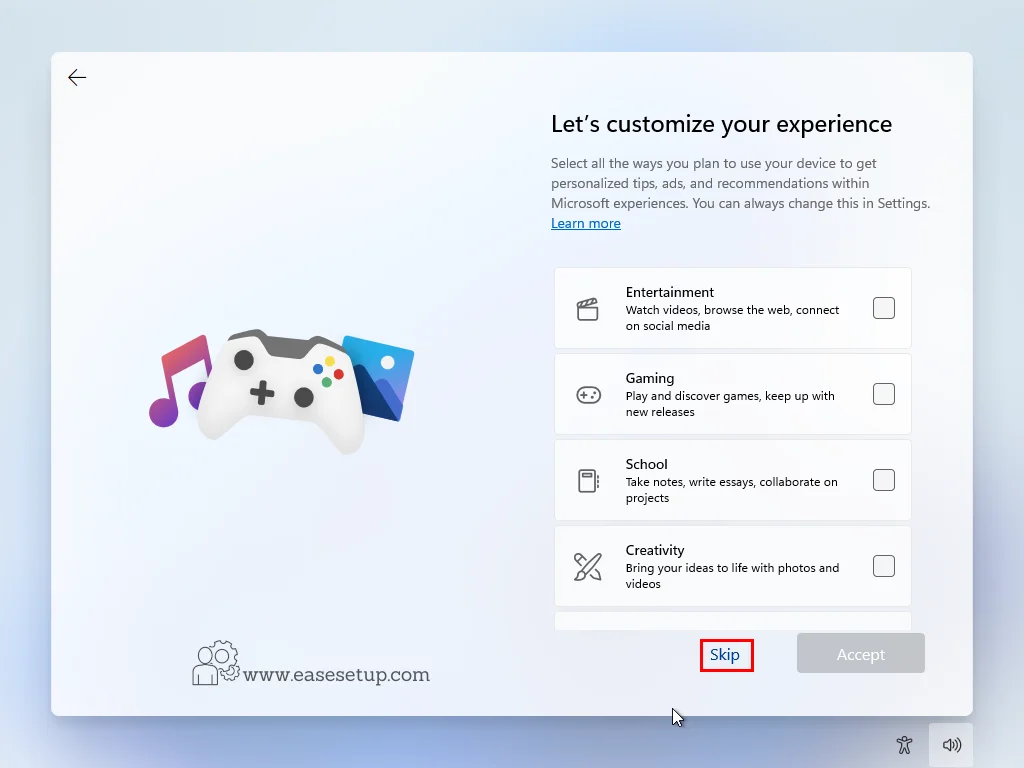
You can customize your setting according to your use tick the box or you can Skip, in my case, I’ll Skip it.
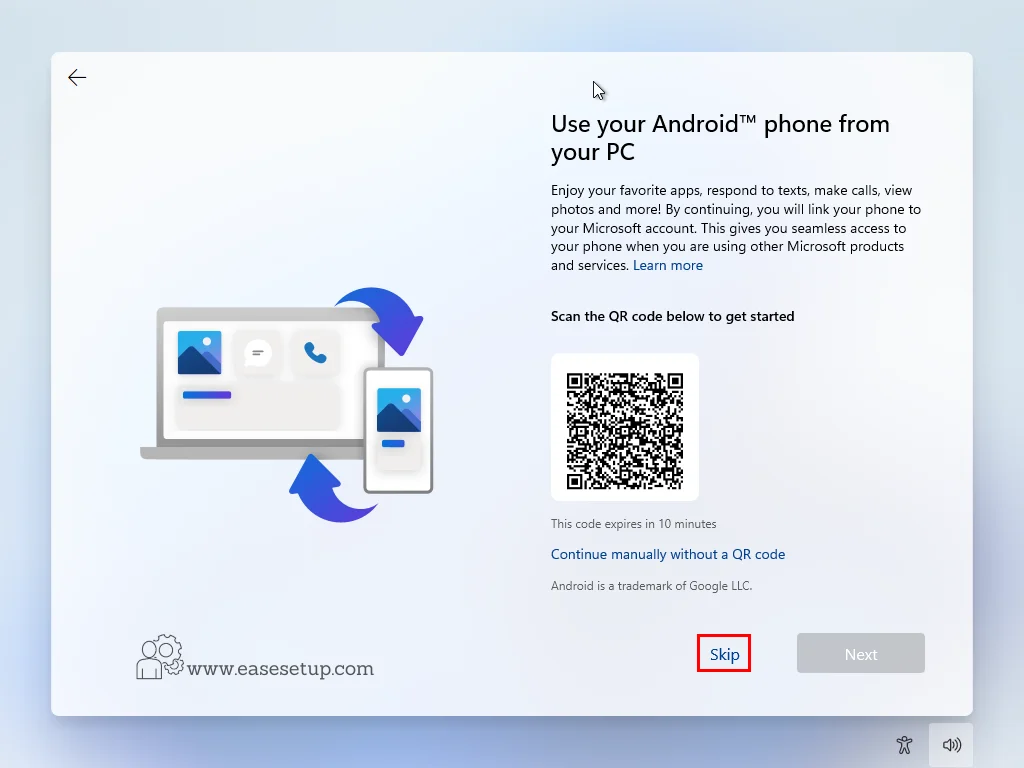
This option is for connecting your phone to your PC (I have a separate article on how to connect an Android phone to your PC)
For now, I am skipping it by clicking Skip
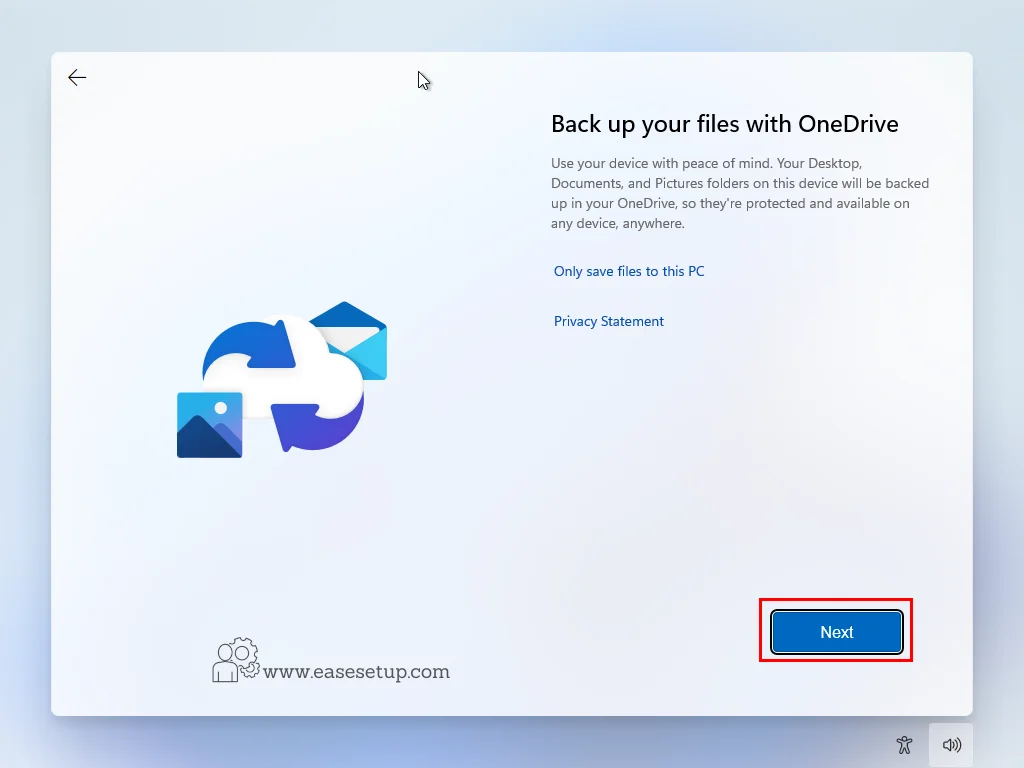
This option is backup your folders like Desktop, Documents and Pictures will backup to OneDrive
Simply click Next to processed
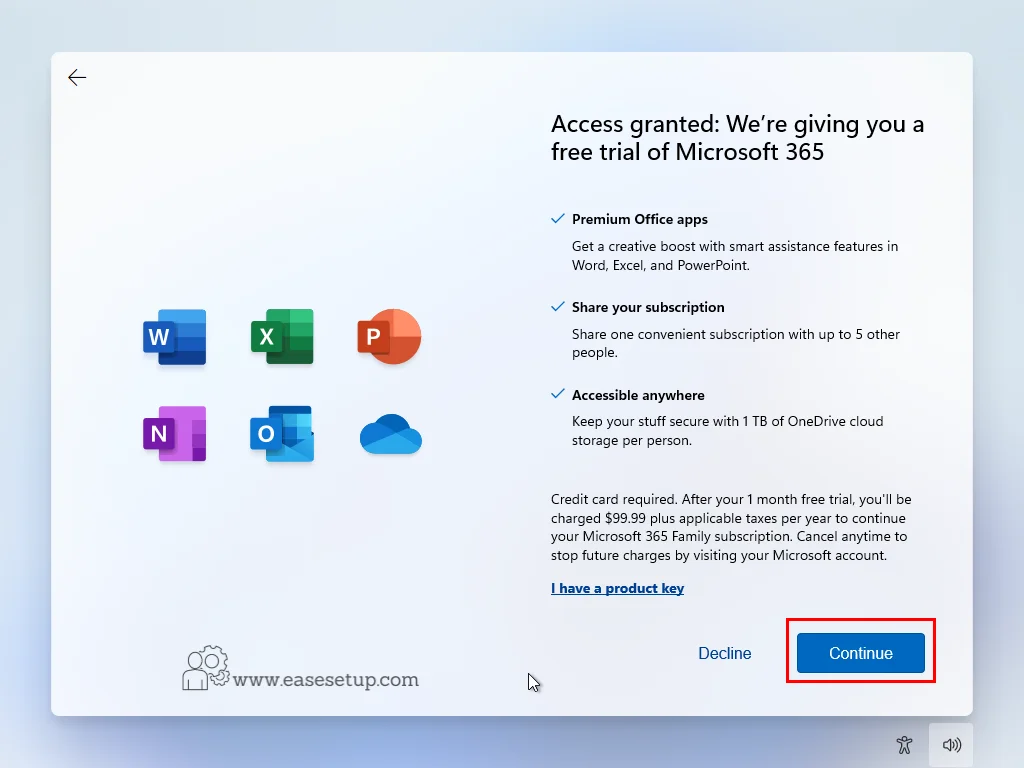
This option is to access Microsoft 365 Apps like Word, Excel, PowerPoint, OneDrive, Outlook and OneNote
Remember this is a trial you have to purchase to use this apps
Click Continue
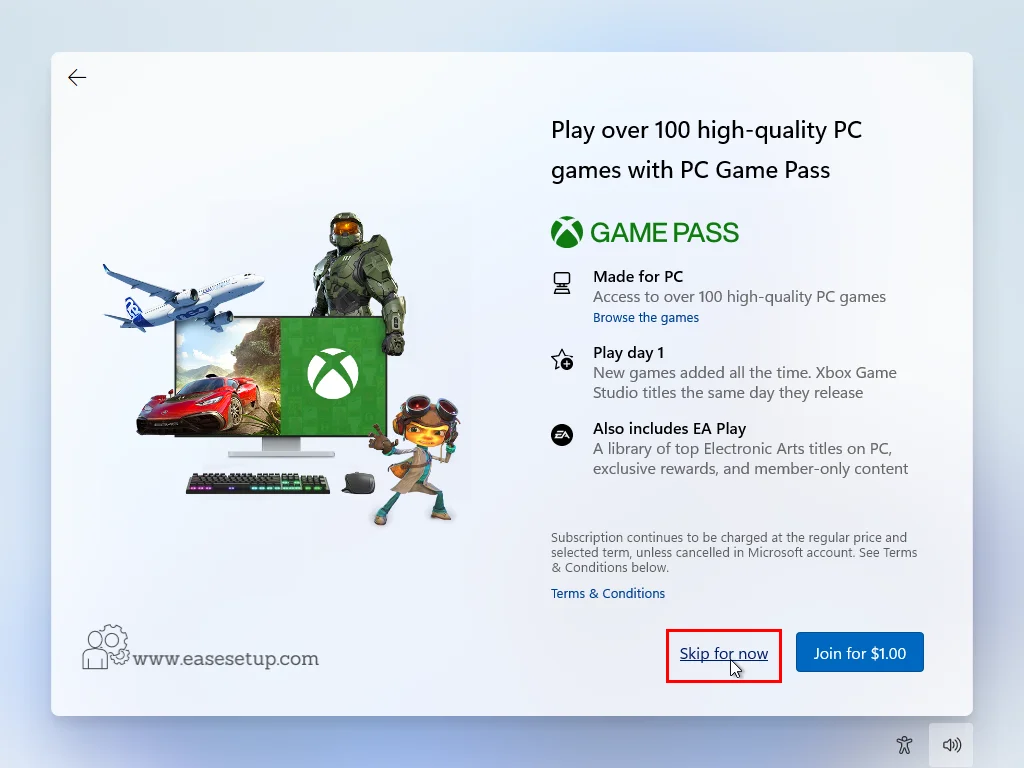
This GAME PASS option is to access 100 and more high-quality PC games is cost you 100$ to join
(check the official to get the price details)
I am simply Skip to click Skip for now
We are now ready to view the newly installed Windows 11 after all the setup has been completed

Finally Here is the New Look of Windows 11
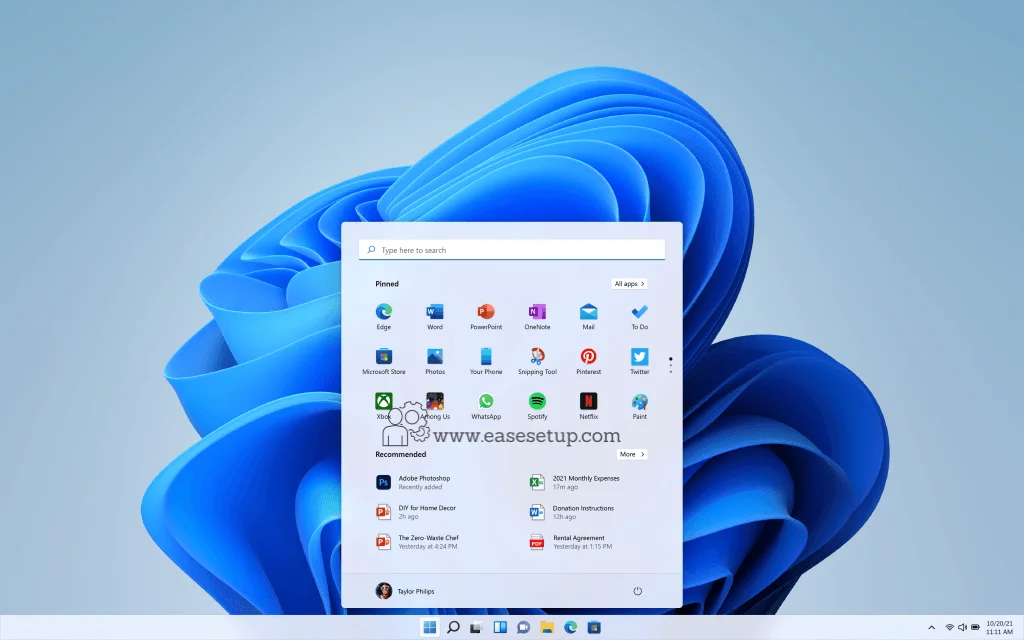
There are a few tasks left to do to activate Windows 11 and install the necessary drivers.
Activation of Windows 11
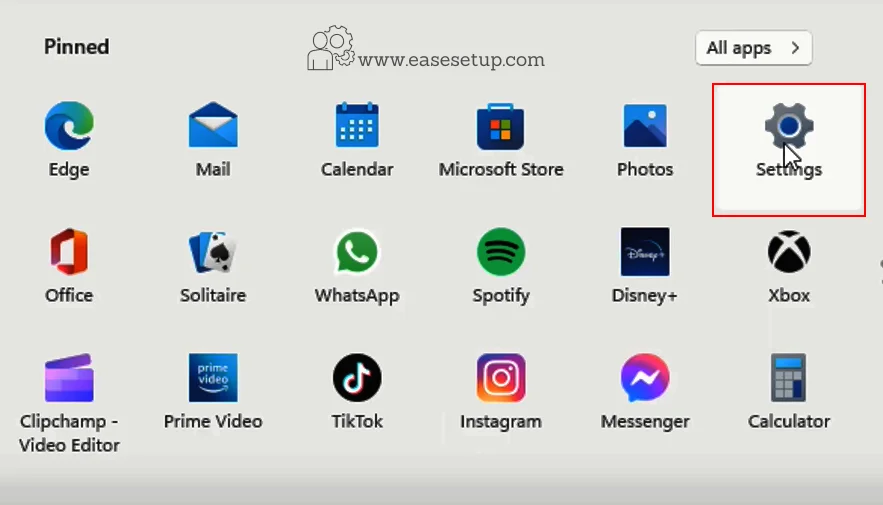
After the installation is complete, you’ll need to activate Windows 11. Go to Settings
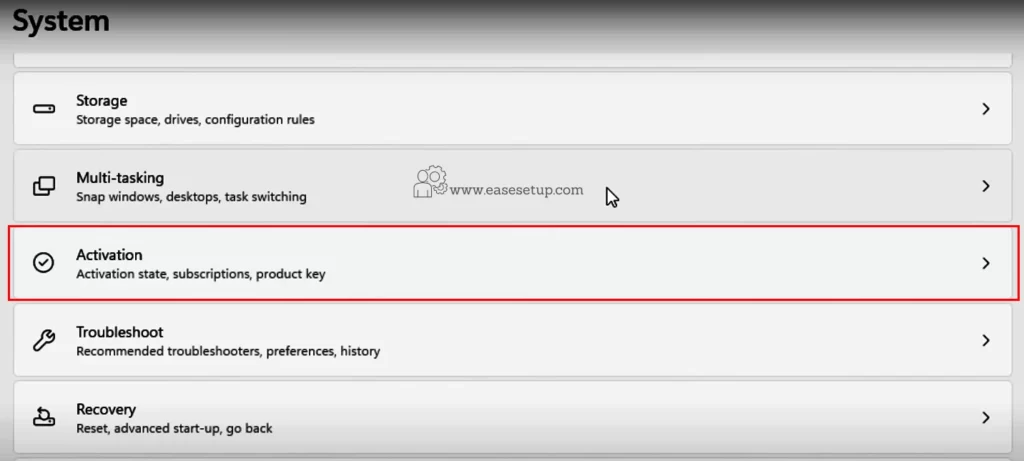
Go to the Activation Tab
You can see Windows is not active
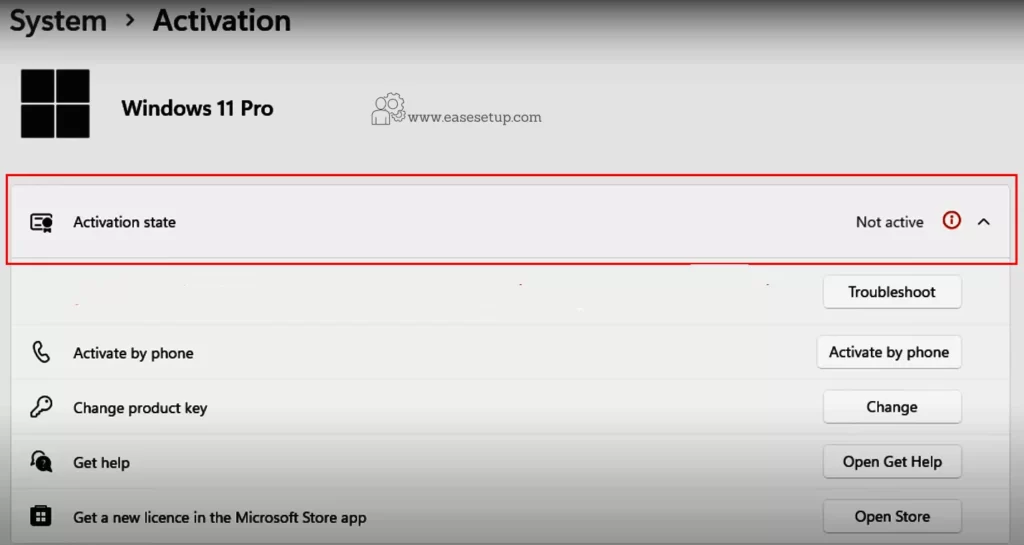
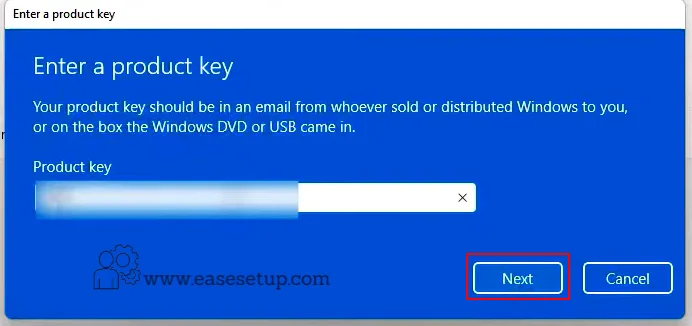
Enter the Product Key and click Next
Enter your product key if you have one or follow the prompts to activate Windows using other methods.
Click on Active
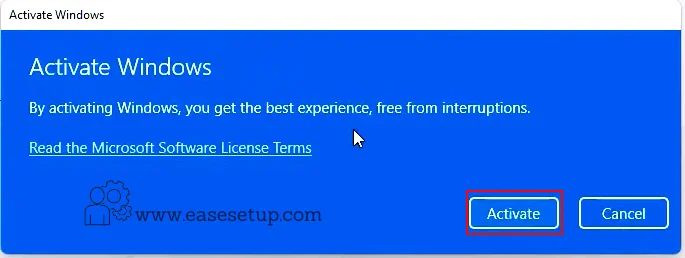
Now we have Successfully Activate the Windows 11

Install Drivers and Software
Windows 11 comes with all necessary Drivers for all branded PCs but in some cases, it’s essential to install the drivers for your hardware components like graphic cards, Printers, etc… for that, we need to Visit the manufacturer’s website for each device and download the latest drivers.
I have listed some brand websites you can search for your driver through model number.
Conclusion:
By following this step-by-step guide, you can perform a clean installation of Windows 11 and enjoy a fresh start with enhanced performance. Remember to back up your important files, adhere to the license agreements, and install the necessary drivers to ensure a seamless experience with Windows 11.
FAQ:
Q. What settings should I use to create a Windows 11 USB flash drive without RAM, CPU, or TPM requirements?
Ans: Attempting to disable or bypass these requirements could lead to compatibility issues, but still we have a solution with RUFUS pen drive bootable maker with the latest version.
Note: Before proceeding, ensure you have a valid Windows 11 ISO file and a USB flash drive with sufficient storage capacity (at least 8 GB).
Step 1: Go to the official Rufus website and download the latest version of Rufus.
Step 2: Once Rufus is downloaded, launch the program. You don’t need to install Rufus
Step 3: Connect your USB flash drive to your computer. In Rufus, it should detect the connected USB automatically. If you have multiple USB drives connected, make sure to select the correct one from the “Device” dropdown menu.
Step 4; Choose the ISO file and keep the default setting and click start now we can customize the Windows bootable files like in the below picture.
Q: Can I upgrade from Windows 10 to Windows 11 without performing a clean installation?
Ans: If your device meets the minimum system requirements for Windows 11, you have the option to upgrade from Windows 10 to Windows 11 without the need for a clean installation. Verifying the eligibility of your device is a simple process that can be done using the PC Health Check app. By following these steps, you can seamlessly transition to the latest version of Windows with ease.
Q: Is there a way to bypass the Windows 11 requirements? Even though it doesn’t meet CPU specs.
Yes, you can do this trick and upgrade the windows but if it is not working you have to use the Rufus to do it, which I have explained above.
Here it is.
Go running by pressing Windows+R
To open the registry editor type “regedit”
Search for “HKEY_LOCAL_MACHINE\SYSTEM\Setup\MoSetup”
and create a DWORD (32-bit) Value add this “AllowUpgradesWithUnsupportedTPMOrCPU” and set the value 1.


